Upgrading Your Roof Ventilation During Replacement
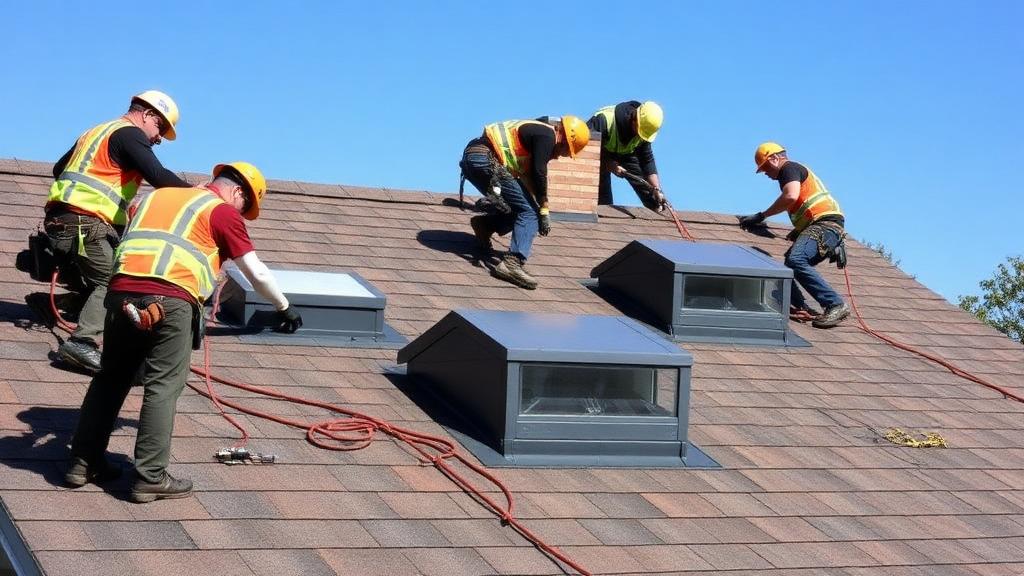
Roof replacement provides the ideal opportunity to upgrade ventilation systems that significantly impact energy efficiency, comfort, and roof longevity. Understanding ventilation principles, options, and upgrade benefits helps you maximize the value of your roofing investment.
Why Ventilation Matters for Your Roof
Proper attic ventilation provides multiple critical benefits.
Temperature Management:: - Reduces summer attic temperatures by 30-40°F - Decreases air conditioning load - Extends shingle life by reducing heat damage - Improves overall comfort in upper floors
Moisture Control:: - Prevents condensation in cold months - Reduces mold and mildew risk - Protects insulation effectiveness - Prevents wood rot in decking and framing
Ice Dam Prevention:: - Keeps roof surface cold in winter - Prevents snow melt and refreeze cycles - Protects against ice dam formation - Reduces related water damage
For comprehensive ventilation information, see our ventilation guide.
Signs Your Current Ventilation Is Inadequate
Recognize ventilation problems before replacement.
Summer Indicators:: - Extremely hot upper floors - High cooling costs - Premature shingle aging - Attic temperatures exceeding 150°F
Winter Indicators:: - Ice dams forming at eaves - Frost on attic surfaces - Condensation on windows - Moisture stains on ceilings
Year-Round Signs:: - Musty odors in upper areas - Mold visible in attic - Peeling paint near roofline - High humidity in upper floors
Understanding Ventilation Requirements
Proper ventilation follows established principles.
The 1/150 Rule:: - Minimum 1 sq ft ventilation per 150 sq ft attic floor - With vapor barrier: 1 sq ft per 300 sq ft - Building codes specify requirements - Balanced intake and exhaust essential
Balance Principle:: - Intake vents at soffits (lower) - Exhaust vents at ridge (higher) - Equal intake and exhaust area - Natural convection creates airflow
Net Free Area (NFA):: - Actual open area of vent - Screens and louvers reduce NFA - Manufacturer specifications vary - Calculate total required NFA
Ventilation Options for Your Replacement
Multiple options exist for improving ventilation.
Ridge Vents:: - Installed along entire ridge - Maximum exhaust capability - Low profile appearance - Most effective exhaust option - Cost: $400-600 for average home
Soffit Vents:: - Installed in eave overhangs - Critical for intake airflow - Continuous or individual styles - Often overlooked but essential - Cost: $200-400 for average home
Box Vents (Static Vents):: - Individual units on roof slopes - Multiple units often required - Visible on roof surface - Less efficient than ridge vents - Cost: $50-100 per vent
Power Ventilators:: - Electrically powered fans - Thermostat or humidistat controlled - Solar-powered options available - Can create negative pressure issues - Cost: $300-600 per unit
Gable Vents:: - Located in gable ends - Supplement other ventilation - Can conflict with ridge systems - Aesthetic considerations - Cost: $75-200 per vent
Optimal Ventilation Strategy
Best practices for most homes.
Recommended Combination:: - Continuous ridge vent for exhaust - Continuous or adequate soffit intake - Balanced NFA between intake and exhaust - Clear airflow path from soffits to ridge
Common Mistakes to Avoid:: - Mixing powered and passive systems - Inadequate intake vents - Blocked soffit vents - Improperly installed ridge vents
The Replacement Upgrade Process
How ventilation upgrades integrate with roof replacement.
Assessment Phase:: - Current ventilation evaluation - Calculation of required NFA - Identification of deficiencies - Upgrade recommendations
Installation During Replacement:: - Ridge vent installation with new roofing - Soffit vent additions or upgrades - Removal of inefficient components - Proper integration with roofing system
Completion and Verification:: - Airflow testing if available - Visual confirmation of installation - Documentation for records - Maintenance instructions provided
Cost-Benefit Analysis
Ventilation upgrades provide strong returns.
Upgrade Costs:: - Ridge vent installation: $400-800 - Soffit vent improvement: $200-600 - Combined upgrade: $600-1,400 - Minimal addition to replacement cost
Potential Savings:: - 10-15% cooling cost reduction - Extended roof life (potentially 5+ years) - Reduced ice dam damage - Lower maintenance costs
ROI Calculation:: With cooling savings of $150-300 annually and extended roof life value, most ventilation upgrades pay for themselves within 3-5 years.
Insulation Considerations
Ventilation and insulation work together.
Proper Relationship:: - Adequate insulation with air gaps at soffits - Baffles prevent insulation blocking vents - Vapor barriers where appropriate - Complete separation of conditioned/unconditioned space
Common Problems:: - Insulation blocking soffit vents - Missing rafter baffles - Inconsistent insulation depth - Air leaks between spaces
Upgrade Opportunity:: Roof replacement allows attic access for insulation improvements that complement ventilation upgrades.
Regional Considerations
Climate affects ventilation priorities.
Hot Climates:: - Maximum ventilation beneficial - Radiant barriers may help - Focus on heat exhaust - Consider powered options carefully
Cold Climates:: - Balance prevents moisture issues - Ice dam prevention critical - Avoid excessive ventilation - Proper insulation essential
Humid Climates:: - Moisture control priority - Adequate ventilation prevents condensation - Consider dehumidification needs - Monitor attic conditions regularly
For climate-specific guidance, see our roofing materials climate guide.
Questions to Ask Your Contractor
Discuss ventilation during replacement planning.
Assessment Questions:: - What's my current ventilation status? - Does it meet code requirements? - What improvements do you recommend? - What will upgrades cost?
Installation Questions:: - What type of ridge vent will you use? - How will you address soffit intake? - Will existing vents be removed or retained? - How is proper balance ensured?
Verification Questions:: - How will you confirm adequate airflow? - What documentation will you provide? - What maintenance is needed? - Are there warranty considerations?
DIY Pre-Replacement Assessment
Evaluate your current ventilation before contractor visits.
Attic Inspection:: 1. Count and measure existing vents 2. Check for blocked soffits 3. Look for moisture or mold signs 4. Feel for temperature extremes 5. Note any visible airflow issues
Exterior Review:: - Count visible roof vents - Check soffit vent conditions - Look for gable vents - Note any power ventilators
Documentation:: Take photos and notes to share with contractors during estimates.
Maximizing Your Investment
Get the most from your ventilation upgrade.
During Planning:: - Discuss ventilation early in process - Get itemized pricing for upgrades - Understand what's included standard - Compare contractor recommendations
During Installation:: - Verify proper installation methods - Confirm balance between intake and exhaust - Request progress photos - Ask questions if uncertain
After Completion:: - Monitor attic temperatures seasonally - Check for moisture issues - Maintain vent cleanliness - Address any problems promptly
Conclusion
Roof replacement presents an ideal opportunity to address ventilation deficiencies that affect energy efficiency, comfort, and roof longevity. The minimal additional cost during replacement delivers significant long-term benefits including lower energy bills, extended roof life, and improved home comfort. Discuss ventilation upgrades with your contractor to maximize your roofing investment value.
Ready to plan your roof replacement with proper ventilation? Find qualified local contractors who understand comprehensive roofing solutions.