Commercial Roof Drainage Systems: Design, Installation, and Maintenance Guide
Effective drainage is essential for commercial roof performance and longevity. Standing water accelerates membrane deterioration, adds structural load, and creates conditions for leaks and biological growth. This comprehensive guide explores commercial roof drainage system design, components, and maintenance to help building owners understand this critical aspect of their roofing systems.
The Importance of Proper Drainage
Commercial roofs face drainage challenges that residential roofs rarely encounter. Large surface areas collect significant water volumes during storms, and the low slopes typical of commercial construction make water evacuation more challenging.
Consequences of Poor Drainage:: Inadequate drainage creates problems that compound over time. Ponding water accelerates UV degradation of roofing membranes. The weight of standing water stresses deck structures. Constant moisture promotes mold, algae, and plant growth. Freeze-thaw cycles in ponding areas cause mechanical damage.
Industry standards define ponding as water remaining 48 hours after precipitation ends. While some roofing materials tolerate occasional ponding, all commercial roofs perform better with positive drainage.
Drainage Design Goals:: Effective drainage systems should remove water from the roof surface quickly, direct water to appropriate discharge points, handle storm intensities specified by local codes, provide redundancy for primary system failures, and require minimal maintenance to function properly.
Drainage System Components
Commercial roof drainage systems consist of several components working together to collect and convey water.
Interior Drains
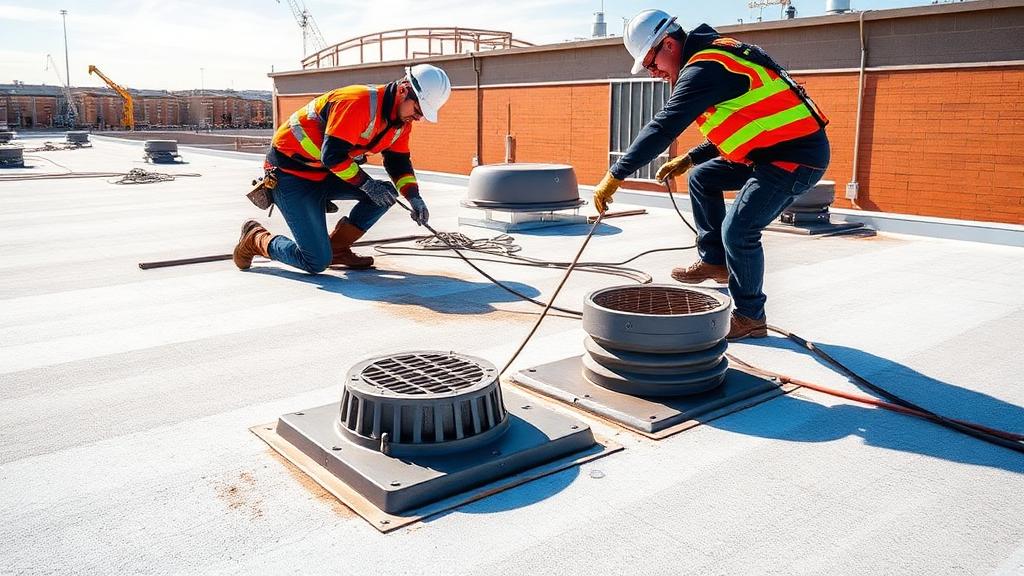
Interior drains are the most common primary drainage for flat commercial roofs. These drains penetrate the roof membrane and connect to internal piping that carries water through the building to storm sewers or retention systems.
Interior Drain Advantages:: - Protected from freezing inside building envelope - Aesthetically invisible from building exterior - Can be positioned for optimal drainage - Suitable for any building height
Interior Drain Components:: - Drain body: Cast iron or plastic housing with clamping ring - Dome strainer: Prevents debris from entering pipe - Membrane clamp: Secures roofing membrane to drain - Internal piping: Sized for design flow rates
Drain placement requires careful consideration of roof slopes and valleys to ensure all water reaches drain locations. Minimum two drains per roof area provide redundancy if one drain clogs.
Scuppers
Scuppers are openings through parapet walls that allow water to drain from the roof. They function as primary or overflow drainage depending on installation.
Scupper Advantages:: - Simple design with few failure modes - Easy inspection from ground level - No penetration through roof membrane - Effective for roofs with parapet walls
Scupper Types:: - Through-wall scuppers: Simple openings directing water to exterior - Channel scuppers: Include formed channels to direct water - Conductor head scuppers: Connect to downspouts for controlled discharge
Scuppers work well for buildings where exterior water discharge is acceptable. Position scuppers at low points along parapet walls with adequate sizing for design storms.
Gutters and Downspouts
Perimeter gutters collect water from sloped roofs or receive discharge from scuppers and conductors.
Gutter Systems:: Commercial gutter systems use heavier gauges and larger sizes than residential systems. Materials include galvanized steel, aluminum, copper, and stainless steel. Sizing must accommodate roof area and local rainfall intensity.
Downspouts:: Downspouts convey water from gutters or conductor heads to grade. Size downspouts to handle design flows without surcharging. Protect downspout bases from damage and ensure discharge does not cause erosion or ponding near foundations.
Overflow Drains
Building codes require overflow drainage for most commercial buildings to prevent roof collapse if primary drains clog. Overflow systems activate when water reaches a specified depth, providing emergency relief.
Overflow Options:: - Overflow drains: Second set of drains set higher than primary drains - Overflow scuppers: Wall openings above normal drainage level - Internal overflows: Emergency routing through interior drains
Overflow systems must discharge in visible locations so building personnel notice activation and address primary system problems.
Drainage System Design
Proper drainage design requires understanding water flow, code requirements, and building characteristics.
Calculating Drainage Requirements
Drainage system sizing starts with the design storm intensity for the building location. Most codes reference rainfall data providing intensity (inches per hour) for various return periods.
Design Considerations:: - Roof area: Total square footage draining to each drain - Rainfall intensity: Local code requirements (typically 3-6 inches per hour) - Safety factor: Typically 1.5-2x calculated flow - Number of drains: Minimum two per roof area
Sizing Example:: For a 10,000 square foot roof area with 4 inch per hour design rainfall: - Flow rate: 10,000 sf x 4 in/hr = 40,000 in-sf/hr - Converting: 40,000 / 96 = 417 gallons per minute - With safety factor: 417 x 1.5 = 625 GPM required capacity
Select drains and piping sized to handle calculated flows with appropriate redundancy.
Slope and Cricket Design
Adequate slope directs water toward drains rather than allowing random ponding.
Slope Requirements:: Building codes typically require minimum 1/4 inch per foot slope toward drains. This slope can be achieved through: - Tapered insulation: Lightweight system for new construction - Structural slope: Built into deck structure - Lightweight fill: Various products level and slope decks
Crickets (saddles) direct water around penetrations and low areas. Design crickets to prevent ponding behind HVAC units and other rooftop equipment.
Drain Placement Strategy
Strategic drain placement minimizes travel distance and ensures complete coverage.
Placement Principles:: - Maximum 100 feet drainage distance to any drain - Drains at low points of sloped areas - Drains at intersecting slopes (valleys) - Avoid placement where equipment blocks access - Consider maintenance access for cleaning
Installation Considerations
Drainage system installation requires coordination between roofing, plumbing, and structural trades.
Membrane Integration
Drain installation must integrate properly with roofing membranes to prevent leaks.
Critical Details:: - Compression ring creates watertight seal - Membrane extends to proper depth in drain bowl - No gaps or fish-mouths at drain perimeter - Sealants applied per manufacturer requirements
Interior drain leaks are common problems resulting from improper installation. Ensure installers follow manufacturer requirements exactly.
Piping Requirements
Internal piping must be sized, sloped, and supported properly.
Piping Standards:: - Size per engineering calculations - Minimum 1/8 inch per foot slope - Proper support at intervals - Clean-outs at required locations - Connection to approved discharge point
Some jurisdictions require separation of roof drainage from sanitary sewer systems. Verify local requirements during design.
Structural Considerations
Large drains require appropriate structural support.
Support Requirements:: - Deck reinforcement around large drains - Proper backing for drain bodies - Consideration for concentrated loads - Support for internal piping
Maintenance Requirements
Drainage systems require regular maintenance to function properly. Maintenance programs should include specific drainage inspection and care tasks.
Regular Inspection
Inspect drainage systems during routine roof inspections and after significant storms.
Inspection Points:: - Dome strainers: Clear of debris, properly seated - Drain bowls: Free of accumulated material - Scuppers: Open, properly flashed - Gutters: Clear, properly pitched, securely mounted - Downspouts: Clear, properly connected
Cleaning Procedures
Regular cleaning prevents debris accumulation that causes drainage failure.
Cleaning Frequency:: - Monthly during leaf-drop season - After significant storms - Quarterly during other periods - Immediately when problems observed
Cleaning Methods:: - Remove visible debris from strainers - Check for debris below strainer level - Flush drains with water to verify flow - Clear scuppers of accumulated debris - Clean gutters and verify downspout flow
Seasonal Considerations
Seasonal changes affect drainage system performance and maintenance needs.
Spring:: Inspect after freeze-thaw cycles. Check for ice damage to gutters and downspouts. Clear winter debris accumulation.
Summer:: Monitor for clogging from biological growth. Address ponding issues identified during this dry period.
Fall:: Increase cleaning frequency during leaf drop. Prepare gutters for heavy flow.
Winter:: Ensure drainage is clear before freeze. Monitor for ice dams in cold climates. Consider heat cables in problem areas.
Common Drainage Problems
Understanding common problems helps identify and address issues quickly.
Clogged Drains
The most common drainage problem results from debris accumulation.
Indicators:: - Standing water around drains - Slow drainage after rain - Debris visible on strainers - Water stains on ceilings below drains
Solutions:: - Regular cleaning and maintenance - Install larger dome strainers - Add secondary screens - Increase maintenance frequency
Inadequate Capacity
Under-sized drainage systems cannot handle design storms.
Indicators:: - Ponding during heavy rain - Water depth exceeds strainer height - Overflow system activates regularly
Solutions:: - Add additional drains - Upsize existing drains and piping - Install emergency overflow scuppers
Ponding Due to Deflection
Deck deflection between supports creates low spots that hold water.
Indicators:: - Ponding between supports - Visible deck sag - Random ponding locations
Solutions:: - Install tapered insulation - Add drains in ponding areas - Structural reinforcement in severe cases
Working with Drainage Professionals
Drainage system issues often require professional evaluation and repair.
Professional Services:: - Drainage system evaluation - Capacity calculations - Improvement design - Installation and repair
Find qualified commercial roofing contractors experienced in drainage system design and installation. Proper drainage is essential for roof system performance.
Conclusion
Effective drainage protects commercial roof investments by removing water that would otherwise damage membranes, stress structures, and create leak opportunities. Understanding drainage system design, components, and maintenance helps building owners ensure their systems function properly throughout the roof lifespan.