EPDM Roofing for Commercial Buildings: Installation, Maintenance, and Repair Guide
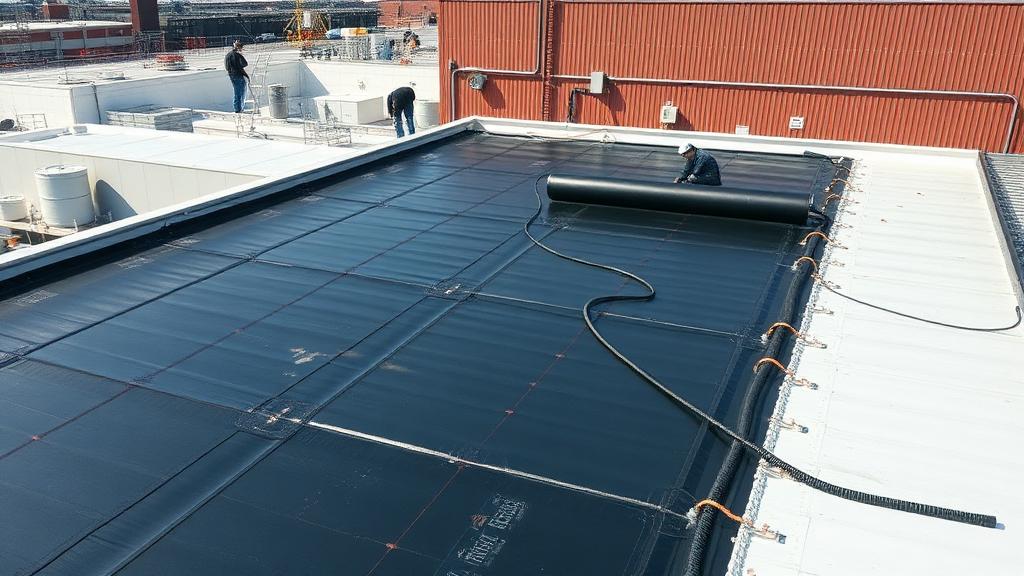
Ethylene Propylene Diene Monomer (EPDM) roofing has protected commercial buildings for over six decades, establishing an unmatched track record of reliable performance. This synthetic rubber membrane remains one of the most popular commercial roofing materials despite competition from newer thermoplastic alternatives. This comprehensive guide explores EPDM roofing technology, installation, maintenance, and repair to help building owners manage their rubber roof investments effectively.
Understanding EPDM Roofing
EPDM is a thermoset rubber compound derived from oil and natural gas byproducts. Unlike thermoplastic membranes (TPO, PVC) that soften when heated, thermoset materials cure during manufacturing and maintain their properties across a wide temperature range. This fundamental characteristic affects EPDM performance, installation, and repair methods.
EPDM Characteristics:: The rubber composition gives EPDM exceptional flexibility that allows the membrane to accommodate building movement, thermal expansion, and substrate irregularities without stress cracking. This flexibility persists even at low temperatures where some materials become brittle.
EPDM resists UV radiation, ozone, and weathering through its molecular structure rather than surface coatings. This inherent resistance means EPDM maintains protection even when surface wear occurs, unlike coated materials that can fail if coatings are damaged.
Standard Specifications:: - Thickness: 45 mil, 60 mil, 90 mil - Colors: Black (standard), white (reinforced) - Sheet widths: Up to 50 feet - Sheet lengths: Up to 200 feet - Expected lifespan: 25-30+ years
The wide sheet dimensions minimize seam requirements, reducing potential leak points. Large sheets can cover extensive areas with minimal seaming, particularly advantageous for open roof areas.
EPDM Installation Methods
EPDM can be installed using several methods depending on building requirements, substrate conditions, and performance objectives.
Fully Adhered Systems
Fully adhered installation bonds EPDM directly to the substrate using contact adhesive. This method provides excellent wind uplift resistance and creates smooth appearance.
Installation Process:: 1. Prepare substrate and apply insulation if specified 2. Position membrane loosely over area 3. Fold membrane back to midpoint 4. Apply adhesive to both substrate and membrane underside 5. Allow adhesive to flash (dry to touch) 6. Roll membrane into adhesive, working from center outward 7. Repeat for remaining membrane section 8. Roll with weighted roller to ensure complete contact
Fully adhered systems require careful attention to adhesive application and flashing time. Temperature and humidity affect adhesive performance; installation should occur within manufacturer-specified conditions.
Advantages:: - Excellent wind uplift resistance - Smooth appearance - Minimal membrane flutter - Works well over irregular substrates
Considerations:: - Higher labor cost than mechanical attachment - Weather-sensitive installation - Substrate preparation critical
Mechanically Attached Systems
Mechanical attachment secures EPDM to the roof deck using plates and fasteners along membrane overlaps and in field areas as required.
Installation Process:: 1. Prepare substrate and install insulation 2. Position membrane over area 3. Install fasteners and plates at specified spacing 4. Overlap adjacent sheets and fasten 5. Apply seam adhesive or tape 6. Complete seam per manufacturer requirements
Mechanical attachment is faster than full adhesion and less sensitive to weather conditions. The method works well for large, simple roof areas without extensive penetrations.
Advantages:: - Faster installation - Less weather-sensitive - Lower installed cost - Works in cold temperatures
Considerations:: - Membrane flutter in wind - More fasteners required in high-wind zones - Fasteners visible as dimples in membrane
Ballasted Systems
Ballasted installation places loose EPDM over the substrate, held in place by gravel, pavers, or other heavy materials. This method requires no adhesives or fasteners but adds significant weight.
Installation Process:: 1. Prepare substrate and install insulation 2. Place membrane loosely, overlapping at seams 3. Apply seam treatment 4. Spread ballast at specified rate (10-12 lbs per square foot typical)
Ballasted systems have lowest installation cost but highest ongoing maintenance requirements. Ballast must be redistributed periodically and inspected after high winds.
Advantages:: - Lowest installation cost - Protects membrane from UV and physical damage - Easy to remove for repairs
Considerations:: - Significant added weight requires structural capacity - Difficult leak detection - Ballast maintenance required - Not suitable for sloped roofs
EPDM Seaming Technology
Seams represent the most critical aspect of EPDM installation quality. Unlike TPO and PVC that use heat welding, EPDM seams rely on adhesive bonding.
Seam Tape
Factory-manufactured seam tape provides the most common EPDM seaming method. The tape consists of uncured EPDM with adhesive on both sides, creating a chemical bond between sheets.
Tape Seaming Process:: 1. Clean membrane surfaces thoroughly 2. Apply seam primer to both membrane surfaces 3. Allow primer to dry per manufacturer instructions 4. Position seam tape centered over joint 5. Roll tape firmly to ensure complete contact 6. Apply caulk or lap sealant at tape edge
Proper cleaning and priming are essential for tape seam performance. Contamination from dirt, oils, or release agents prevents proper bonding.
Liquid Adhesive
Liquid seam adhesive creates bonds similar to tape seaming but allows more control over adhesive placement.
Adhesive Seaming:: 1. Clean and prime membrane surfaces 2. Apply adhesive to both surfaces 3. Allow adhesive to flash 4. Mate surfaces and roll firmly
Liquid adhesive is useful for irregular areas where tape application is difficult. Some specifiers prefer liquid adhesive for critical applications.
Seam Quality Concerns
EPDM seam performance has been the subject of industry discussion as systems age. Some older seams have shown separation, leading to leaks. Modern seaming materials and methods have addressed earlier concerns, but seam inspection remains important during maintenance programs.
EPDM Maintenance Requirements
EPDM requires less maintenance than many commercial roofing systems, but regular inspection and care maximize lifespan and performance.
Inspection Focus Areas
Regular inspections should examine these EPDM-specific concerns:
Seams:: Check all seams for adhesion, looking for separation, lifting, or fish-mouthing (gaps at seam edges). Probe seams gently to test bond integrity. Address any separation immediately before water intrusion occurs.
Flashings:: Examine flashings at penetrations, walls, and terminations. EPDM flashings may separate from substrates due to building movement or adhesive aging. Look for lifting, gaps, or sealant failure.
Surface Condition:: While EPDM ages gracefully, examine surface condition for unusual wear, brittleness, or damage. UV exposure gradually stiffens EPDM; extreme stiffening may indicate end-of-life approaching.
Drainage:: Verify drains and scuppers are clear and drainage systems function properly. Ponding water, while tolerated by EPDM, accelerates aging and should be minimized.
Maintenance Tasks
Routine EPDM maintenance includes:
Debris Removal:: Clear debris that can abrade membrane surface or clog drainage. Pay attention to areas around equipment where debris accumulates.
Drain Cleaning:: Clean drains, scuppers, and gutters regularly. EPDM roofs often use interior drains requiring particular attention to prevent clogging.
Sealant Renewal:: Exterior sealants at flashings and terminations require periodic renewal. Budget for sealant maintenance every 5-7 years.
Coating Consideration:: White roof coatings applied over black EPDM can improve energy efficiency and extend membrane life by reducing thermal stress.
Common EPDM Repairs
Understanding common repairs helps building owners evaluate contractor proposals and maintain their EPDM investments.
Seam Repairs
Separated seams are the most common EPDM repair. Early detection through regular inspection minimizes damage.
Repair Procedure:: 1. Clean and dry the affected area 2. Carefully peel back separated membrane 3. Clean old adhesive and contamination 4. Apply primer to both surfaces 5. Apply new seam tape or adhesive 6. Roll firmly and apply sealant at edges
Seam repairs are straightforward when addressed promptly but become complicated if water has entered the system.
Puncture Repairs
Punctures from foot traffic, dropped tools, or vandalism require patching.
Patch Repair Procedure:: 1. Clean area extending 6 inches beyond damage 2. Apply primer 3. Cut EPDM patch extending 3 inches beyond damage in all directions 4. Apply adhesive to patch and membrane 5. Allow proper flash time 6. Press patch firmly and roll 7. Apply sealant at patch perimeter
Use only EPDM-compatible materials for repairs. Incompatible materials may not bond properly or could damage surrounding membrane.
Flashing Repairs
Flashing failures at penetrations and walls are common as buildings age and move.
Typical Flashing Repairs:: - Resealing with compatible caulk - Overlaying with new EPDM flashing - Complete flashing replacement
The appropriate repair depends on failure extent and remaining flashing life. Minor issues may need only sealant; extensive failures warrant replacement.
EPDM vs. Thermoplastic Alternatives
Building owners often consider EPDM against TPO and PVC alternatives. Understanding differences helps make informed decisions.
EPDM Advantages:: - Longest track record (60+ years) - Lower material cost - Excellent flexibility in cold climates - Simpler repairs with readily available materials - Wide sheet sizes minimize seams
Thermoplastic Advantages:: - Heat-welded seams (no adhesive bonding) - White color for energy efficiency - Simpler seaming process - Growing market acceptance
The choice depends on project priorities, climate, building use, and owner preferences. Both categories provide excellent performance when properly specified and installed.
Working with EPDM Contractors
EPDM installation requires skilled workers familiar with adhesive application, seaming, and flashing details.
Contractor Qualifications:: - Manufacturer certification for EPDM installation - Documented experience with specified installation method - Quality control procedures for seaming - References from completed projects
Find qualified commercial roofing contractors with EPDM experience and manufacturer relationships to ensure proper installation and warranty coverage.
Conclusion
EPDM roofing provides reliable, cost-effective protection for commercial buildings with a track record unmatched by newer alternatives. Proper installation, regular maintenance, and prompt repairs maximize the return on EPDM investments. Understanding EPDM technology helps building owners work effectively with contractors and make informed decisions about their roofing systems.