Roof Flashing Repair: How to Fix Leaks Around Chimneys, Vents, and Skylights
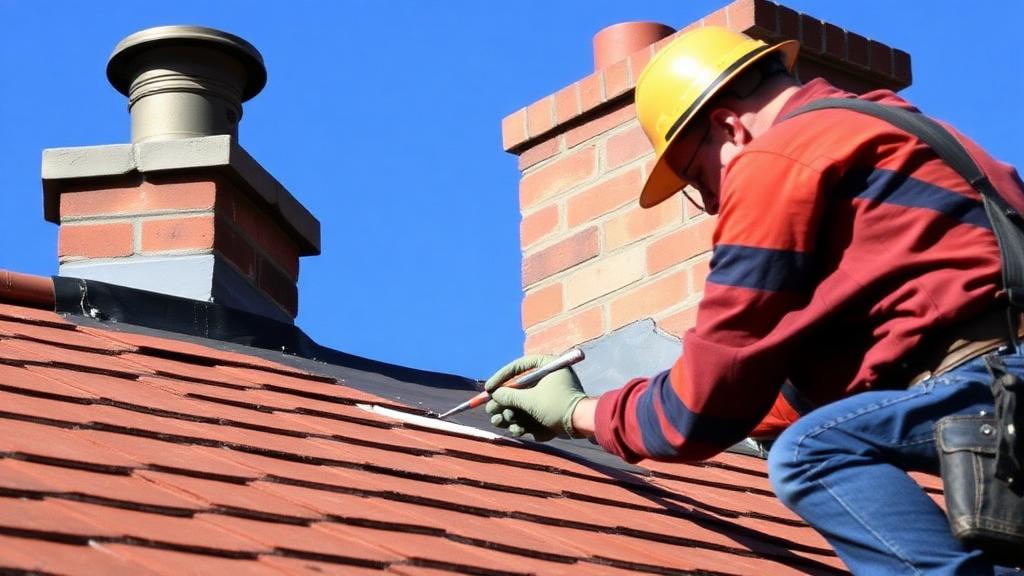
Roof flashing is responsible for waterproofing the most vulnerable areas of your roof—where different materials meet and where penetrations occur. This comprehensive guide covers identifying, repairing, and preventing flashing failures.
Understanding Roof Flashing
Flashing consists of thin metal pieces that direct water away from roof penetrations and transitions.
Types of Roof Flashing:
| Type | Location | Common Materials |
|---|---|---|
| Step flashing | Wall-to-roof intersections | Aluminum, galvanized steel |
| Counter flashing | Over step flashing on masonry | Lead, aluminum |
| Chimney flashing | Around chimneys | Lead, aluminum, copper |
| Vent flashing (boot) | Plumbing vents | Rubber, neoprene, lead |
| Skylight flashing | Around skylights | Aluminum, factory-made kits |
| Valley flashing | Roof valley intersections | Aluminum, galvanized steel |
| Drip edge | Roof edges | Aluminum, galvanized steel |
Why Flashing Fails:
- Age deterioration - Materials corrode, crack, or become brittle
- Thermal movement - Expansion/contraction breaks seals
- Improper installation - Original work was insufficient
- Physical damage - Storm impacts or debris
- Sealant failure - Caulk and tar deteriorate faster than metal
- Building movement - Settling shifts flashing alignment
Identifying Flashing Problems
Recognizing flashing issues early prevents extensive water damage.
Visual Inspection Signs:: - Rust or corrosion visible on metal - Lifted or separated flashing edges - Cracked or missing sealant - Gaps between flashing and surfaces - Bent or dented flashing - Missing flashing pieces
Water Damage Signs:: - Stains on ceilings near chimneys or skylights - Water marks on walls below roof transitions - Moisture in attic around penetrations - Active drips during rain
Annual Inspection Points:: Check all flashing during regular roof inspections: - Chimneys on all sides - All plumbing vents - Skylights perimeter - Roof-to-wall transitions - Valleys - Drip edges
Chimney Flashing Repair
Chimney flashing is complex, involving multiple components working together.
Chimney Flashing Components:: - Base flashing (L-shaped against chimney base) - Step flashing (individual pieces along chimney sides) - Counter flashing (embedded in mortar, covers step flashing) - Cricket or saddle (diverts water on upslope side of wide chimneys)
Common Chimney Flashing Problems:
- Separated counter flashing
- - Mortar deterioration releases flashing
- - Water enters behind step flashing
- - Repair: Reinstall with fresh mortar or masonry sealant
- Failed sealant at base
- - Original tar or caulk cracks
- - Water seeps at chimney-roof junction
- - Repair: Remove old sealant, apply fresh roofing cement
- Rusted step flashing
- - Galvanized coating fails over time
- - Rust holes allow water entry
- - Repair: Replace affected step flashing pieces
- Missing cricket
- - Water pools behind wide chimneys
- - Accelerates shingle deterioration
- - Repair: Install cricket (usually professional job)
DIY Chimney Flashing Repair (Minor):: Suitable for minor sealant failures: 1. Clean old sealant with wire brush 2. Apply roofing cement generously 3. Press flashing into cement 4. Apply additional cement over edges 5. For counter flashing, use high-grade polyurethane sealant
When to Call Professionals:: - Counter flashing completely separated - Multiple step flashing pieces damaged - Cricket needed - Mortar joints failing - Chimney structure compromised
Vent Pipe Flashing Repair
Plumbing vent boots are among the most common failure points.
Vent Boot Anatomy:: - Metal base plate (nailed under shingles) - Rubber or neoprene collar (seals around pipe) - Sometimes includes additional storm collar
Common Vent Boot Problems:
- Cracked rubber collar
- - Sun exposure degrades rubber
- - Cracks appear around pipe
- - Water enters through cracks
- Separated collar
- - Collar pulls away from pipe
- - Gap allows water entry
- - Often combined with cracking
- Corroded base plate
- - Metal deteriorates over time
- - Rust holes develop
- - Base no longer seals
DIY Vent Boot Repair:: For cracked but structurally sound boots: 1. Clean area around failure 2. Apply roofing sealant around pipe 3. Press rubber collar into sealant 4. Apply additional sealant over collar edge 5. Consider adding storm collar for extra protection
DIY Vent Boot Replacement:: For severely damaged boots: 1. Lift shingles overlapping boot 2. Remove nails from base plate 3. Slide out old boot 4. Apply roofing cement to new boot base 5. Slide new boot over pipe 6. Nail base in place 7. Replace shingles over boot edges 8. Seal all edges and nail heads
Cost: $15-$40 for boot plus sealant vs. $150-$300 professional
Skylight Flashing Repair
Skylights are notorious leak sources due to their complexity.
Skylight Flashing Types:: - Factory flashing kits (matched to skylight) - Site-built flashing (custom fabricated) - Integrated mounting flanges
Common Skylight Problems:
- Sealant failure around frame
- - Perimeter caulk deteriorates
- - Water seeps around frame
- - Repair: Remove old sealant, apply new
- Head flashing failure
- - Flashing at top of skylight fails
- - Water enters behind skylight
- - Often requires shingle removal to repair
- Condensation mistaken for leak
- - Moisture forms inside, not outside
- - Appears as leaking skylight
- - Address with improved ventilation
DIY Skylight Repair (Minor):: For sealant-only issues: 1. Remove old cracked sealant completely 2. Clean surfaces thoroughly 3. Apply high-quality silicone or polyurethane sealant 4. Ensure continuous bead without gaps 5. Smooth for water shedding
Professional Skylight Repair:: Required when: - Flashing kit replacement needed - Shingle removal required - Skylight frame is damaged - Structural issues around opening - Proper slope and drainage compromised
Valley Flashing Repair
Valleys channel significant water volume and must function perfectly.
Valley Flashing Types:: - Open valley (metal visible) - Closed valley (shingles cover metal) - Woven valley (shingles interlace, no exposed metal)
Common Valley Problems:
- Debris accumulation
- - Leaves and debris trap moisture
- - Accelerates shingle deterioration
- - Causes water backup during rain
- Rust and corrosion
- - Metal deteriorates over time
- - Holes develop in valley metal
- - Water penetrates to deck
- Lifted shingle edges
- - Wind lifts valley shingles
- - Exposes underlayment or deck
- - Allows water infiltration
DIY Valley Maintenance:: - Regular debris cleaning - Inspection for damage - Minor sealant applications - Pressing down lifted shingles
Professional Valley Repair:: Required for: - Metal replacement - Extensive shingle damage - Underlying deck issues - Complete valley reconstruction
Step Flashing and Wall Transitions
Where roofs meet walls, step flashing provides waterproofing.
Step Flashing Problems:
- Lifted or separated pieces
- - Individual pieces come loose
- - Gaps allow water entry
- - Repair: Renail and seal
- Missing pieces
- - Pieces blow off in wind
- - Creates direct water entry
- - Repair: Install replacement pieces
- Counter flashing failure
- - Wall covering that overlaps step flashing fails
- - Water enters behind step flashing
- - Repair: Reseal or replace counter flashing
DIY Step Flashing Repair:: For loose or separated pieces: 1. Lift overlapping shingles carefully 2. Renail step flashing piece 3. Apply roofing cement under shingle tabs 4. Apply sealant to flashing-wall junction 5. Press shingles back down
Preventive Flashing Maintenance
Regular maintenance extends flashing life and prevents leaks.
Annual Maintenance Tasks:: - Visual inspection of all flashing - Debris removal from valleys and around penetrations - Sealant inspection and touch-up - Check for lifted or loose pieces - Document condition for future reference
Sealant Maintenance:: - Inspect every 2-3 years - Remove cracked or deteriorated sealant completely - Apply fresh sealant before failures occur - Use high-quality roofing sealants rated for temperature extremes
Seasonal Considerations:: - Spring: Check for winter damage - Summer: Apply sealant repairs (warm application improves adhesion) - Fall: Clean debris before winter - Winter: Monitor for ice dam effects
Flashing Repair Costs
Understanding costs helps with budgeting and contractor evaluation.
DIY Material Costs:: - Roofing sealant: $5-$15 per tube - Vent boot: $15-$40 - Step flashing pieces: $2-$5 each - Roll valley flashing: $30-$60 per roll - Counter flashing: $20-$50 per section
Professional Repair Costs:
| Repair Type | Typical Cost Range |
|---|---|
| Vent boot replacement | $150-$300 |
| Minor chimney flashing | $200-$400 |
| Complete chimney reflashing | $500-$1,500 |
| Skylight flashing repair | $300-$700 |
| Valley repair | $400-$1,000 |
| Step flashing section | $200-$500 |
When Repair Becomes Replacement
Sometimes repair isn't sufficient.
Consider Full Reflashing When:: - Multiple flashing areas are failing - Roof is being replaced - Chronic leaks despite repairs - Flashing materials are obsolete - Building codes have changed
Benefits of Complete Reflashing:: - All vulnerable areas addressed simultaneously - Modern materials with better durability - Proper integration with roofing system - Extended leak-free performance
Conclusion
Flashing repair ranges from simple DIY sealant applications to complex professional reconstruction. Understanding flashing types, recognizing failure signs, and knowing repair limits helps you address problems appropriately. Regular inspection and maintenance prevents most flashing failures.
Ready for professional flashing assessment? Find experienced roofing contractors who specialize in leak repair and flashing work.